I can't wait to hear the first crisp clean notes out of the box. Each step of the way my excitement grows!
This week began with back construction. The back wood is jointed and planed to produce a seamless joint, in the same fashion as the top. After the pieces are glued together with hide glue, and taken down to proper thickness on a thickness sander, the outline is drawn on using the plexiglass half template. Then the shape is cut out on the band saw leaving a quarter inch extra around the entire shape.
.
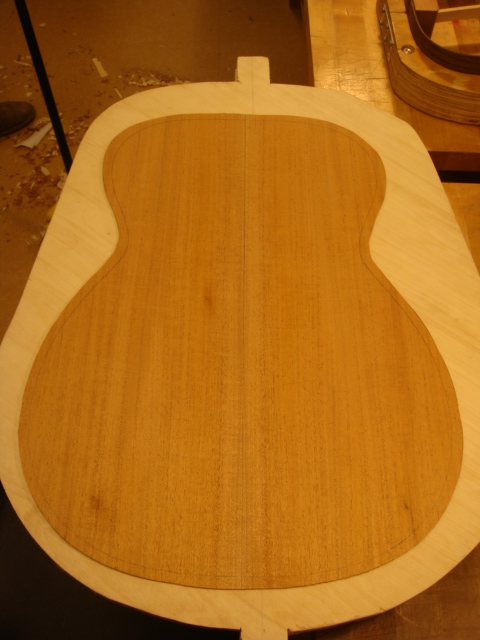
The back is sanded out to 220 grit to leave a clean presentable surface which will show through the sound hole when the guitar is finished. The next step is to make a back center strip for support of the back joint using a "cross grain" piece of wood left over from the top wood. The "cross grain" means that we use a piece of wood in which the grains run opposite of the grain in the back wood . This will provide a very strong support for the back seam.
The back then gets four horizontal braces spaced out in a ladder form. The braces are cut form the same type of spruce as the top braces. They are radius-ed to have a twenty foot arch on their bottom to which the back will conform. The back strip is notched for each of the back braces, they are laid out using a pre-made plexiglass template, and glued into place using the go bar system.


While the back braces are drying, my attention was turned back to the ribs, or sides. The next step in the side construction is to glue in the neck and tail blocks. These mahogany blocks will provide support for joining the sides together, and the top and bottom to the sides. The blocks are glued in with Titebond wood glue. This is especially important in the neck block because it will also be used for the neck dovetail joint. This joint will need to be heated and possibly steamed loose many years down the road to allow for re-setting of the neck, so it is important for the block to be glued with a more heat and moisture resistant glue.
The blocks are glued and clamped in place with a sixteenth of an inch exposed on the top edge, and an eighth inch exposed on the bottom edge. This will be sanded flush later before joining the top and back to the ribs.


The top end of the tail block is then beveled to match the width of the kerfing that will line the inside edges.
This allows the top to move freely of the block and will help prevent cracking in the tail section of the top later in life.

On Thursday we took the morning to preform the final voicing of our guitar tops. This is a very important step in the process which lends a lot to the final sound and tone of the finished instrument. From the beginning of the build we are encouraged to tap on each of our pieces of wood and listen to the sounds produced. We listen closely to the tone, speed, resonance, and sustain of the sound and make note of what we hear. We also tap our classmate's woods and listen to the differences in the different types of woods. Each time we change the wood by thickness sanding, bracing, and carving, these "tap tones" are changed. We carefully make these changes to allow for the best tone and flexibility of the woods. Our instructor, David Vincent has built many fine instruments, and has helped hundreds of students to do the same. In the final voicing, Dave taps and flexes each of our tops and recommends places in the bracing which he feels should be carved and shaped for optimal tone.


The ribs are then also sanded out to 220 grit to prepare them for kerfing and side brace installation. Kerfing is a quarter inch thick half inch tall strip of wood that has been sawn almost all the way through from one side leaving it flexible. The kerfing is glued inside the ribs aligned with the top and back edges to provide a stronger, wider surface area for the top and back to be glued to. The kerfing is prepped by moistening and pre- bending on a bending iron, then clamping into position to dry. For clamps we use wooden clothes pins wrapped with rubber bands to increase clamping pressure. Once the strips have taken shape they are glued in with Titebond glue. Any places where the clothes pin clamps are not strong enough a mini quick clamps will squeeze the kerfing tight to the sides.


While the glue was drying i took some tome to draw out the dimensions for my fingerboard onto the set of plans I purchased. I will use this drawing next week when prepping my fingerboard.

No comments:
Post a Comment