
You can feel the excitement build each day in the shop, as we near completion of our projects. Each step now is more and more crucial to the final appearance of the instrument so care must be taken to ensure good fit and finish. Each item must be carefully thought out and planned, before making any cuts, routs or sanding strokes.
We began the week by sanding the edges of the ribs and kerfing flush together. We purposefully install the kerfing about 1/16- 1/32" high on the ribs so that we can sand it all flush using radius dishes and bars to leave those edges the same radius as the top and back. This allows for a snug stress free joining of the top and back to the ribs,


The back of the guitar is voiced in the same manner as the top by tapping, flexing and shaping its braces.
Then the back edge of the ribs are notched to receive the back braces in a similar way to the top. Only for this step David showed us a much more fool proof way. Because we all used the same pre made template
to space out and install our back braces, we were all able to use a router and a jig to cut the notches for the braces. Much easier! Much faster! It's really cool to learn some of these production steps that can save time and stress in later builds.
Before gluing on the back and closing the box forever, I took a moment to thank those in my life that have made this possible for me. I wrote a small dedication on the inside of the top to my late Aunt Trisha. Trisha was my mother's sister, and the first musical memory i have is of her playing guitar for me. This was The start of my musical journey. The dedication will only be visible using a light and mirror to look inside the guitar.
I also wrote a few words on the neck block that will be visible through the sound hole.


The excess overhang of the top and back are shaved off with a flush trim router bit, and the ribs are sanded to be as flat as possible to ensure an even cut later for the binding rout, and whats left is a nice flush guitar shaped box!


Friday was spent preparing the body for the neck. We use a formula to calculate the the angle that the neck will set into the guitar. This must be calculated to include an amount of expected settle in. Settle in is the amount that we expect the guitar to move from the pressure of the strings pulling on it. Once we have our angle figured out we use the numbers to make a temporary "bridge" shim. We use this shim and a flat block to sand a slight angle into the upper bout of the guitar where the neck will be joined. The fingerboard will rest on this angle also.


The body is then mounted in a large jig set up and the dovetail is routed. The dovetail joint for the neck is the tradition way of attaching the neck to the body. It provides a strong tight fit that will last for years to come, and will be able to be pulled apart later for re setting the neck to correct the angle after many years of string tension pulling on it.


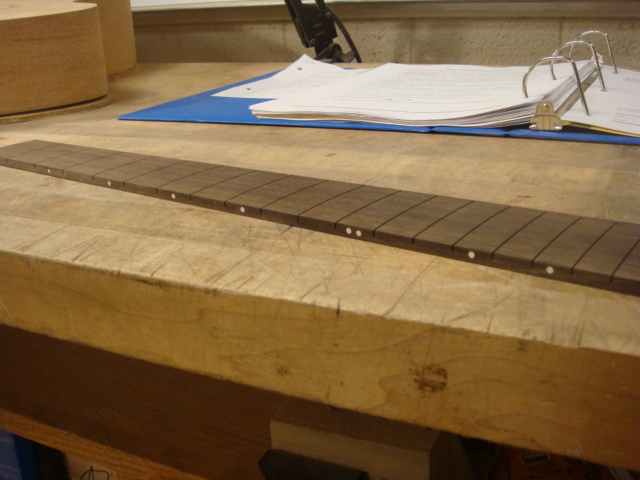
All of my down time this week while glue was drying and things were setting, was spent finishing up my fingerboard. The board is Macassar Ebony, and will match the bridge, and head stock veneer. This week it was carefully sanded to its final 16" radius, and the side position dots were installed.


Next week i will cut ans shape the neck, set the dovetail, fret the fingerboard, install the binding around the body, and possibly putting the thing together! Its all coming up soon!
No comments:
Post a Comment