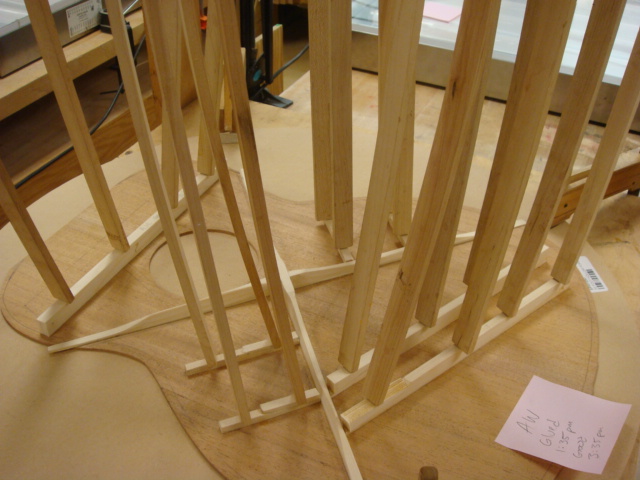
The first step of the week was to radius the bottoms of the bracing sticks to match the desired radius of the top. The bracing supports the guitar top from all of the pressure it will endure through years of string tension,
a notch is cut into the center of the main x braces so that they will fit together, and provide the strongest point of support.


The brace shaping and carving is done with a chisel, finger plane, and sand paper.
There is a shape indicated on the plans and we are encouraged to try slight modifications, which will effect the tops final flexibility. Once all of the bracing is installed and shaped, David, will flex and tap the tops and make suggestions for more shaping.


The two sides are then double stick taped together with the insides together and the outsides out. Then using a plexi glass template, I drew the profile of the sides and cut them out on a band saw.


Now it is time to bend the sides! This is a slightly stress-full time in the build, because things can go perfectly, or horribly wrong! The wood is wet with water, wrapped in paper towel, then wrapped in tin foil, and laid on a heating blanket. It is pressed between two flexible pieces of spring steel. The whole " rib sandwich" is clamped loosely on a bending mold. The heat blanket is plugged in, and the "sandwich" is bent around the mold over a 3 minute time and left to set for 40 minutes. It is then re heated and left to set another 20 minutes. Then while still warm it is clamped into an outside mold shape and left over night.


The mahogany neck and tail blocks will ad strength and support on the ends of the guitar. They are cut to length and the inside edges are beveled mainly for looks just in case anyone ever sees the inside of the box!

The final set of braces that go into the top are the upper transverse graft, the sound hole braces, and the bridge plate. The graft and sound hole braces are thin strips of leftover top wood that are glued in for extra support. The bridge plate is made of maple and cut to fit into the lower x brace section. I chose maple for this piece because it will not color the sound of the top unlike rosewood ( the other common choice ) which would tend to add a bit of treble and re-verb to the overall tone of the guitar. Because my guitar is made of all mahogany ( a stiff hard wood ) it will already have enough treble built in. This set of braces was prepped and glued in in the final hour of Friday. They will be un-clamped first thing next week and the top will be mostly ready for the guitar!

No comments:
Post a Comment