Its been a busy week in the shop! Each morning we start our day with a short instructional lecture and discussion on our tasks for the day. Each step of the process is demonstrated by our instructor David Vincent as he builds his guitar for the year. Dave helps us see how each step effects the finished instrument.
The first step was to make plexi-glass templates for half of the top, and the neck profile. these templates will be used to make exact dimension parts from the wood.
The neck shape is not included in the printed plans because the guitar neck shape and size is a personal choice to the builder. Much of the play-ability and feel of the guitar comes from this part of the design. My neck measurements and shape comes primarily from a 1967 Martin O.M. that was brought in by a customer for Dave to repair.
We then used our half body template to trace onto a sheet of plywood for constructing a work board.
this work board will be come a sturdy FLAT surface for us to lay or work on and also serve as a holder when things are being glued together. It is draw out, cut out, and run through a thickness sander to make it as flat as possible.
We also draw out and make a cork lined top template to rest our work on later to protect it from damage while we work,
While all this is going on we are also joining our top wood together! The top wood comes in two book-matched pieces about 9" wide. These pieces must be planed perfectly flat on one edge so that they can be glued together with a perfect seam. After the planing yields a seam which shows no light through when viewed with a light source under neath, it is placed on a jig, glued with hot hide glue and clamped up tight!


Once the top wood is glued up and dry it is removed from the jig and the glue seam is scraped to remove any glue that was squeezed out and has dried on the top and bottom. The joint is inspected to ensure it is sound, and the top wood is run through a thickness sander to bring it down to 3mm thick. Dave assist with this part of the build to ensure accuracy. We then use another jig and a 5 lb weight to test the deflection of the top under pressure. Dave helps us use these numbers and the tap tones of the wood to determine how much more thickness to remove if any to achieve the best top stiffness for the instrument being built.
The shape is then traced onto the top wood using the plexi template, and cut out with a 1/4" over-sized edge.
We then lay out the position of the sound hole and rosette using a compass and calipers. When we are certain the placement and measurements are right we use a laminate trim router to rout a slot for the rosette.
The rosette is glued in place and clamped and let to dry. When the glue is set the rosette is scraped flush to top wood and the sound hole is routed out.
It's starting to look like a guitar top now!
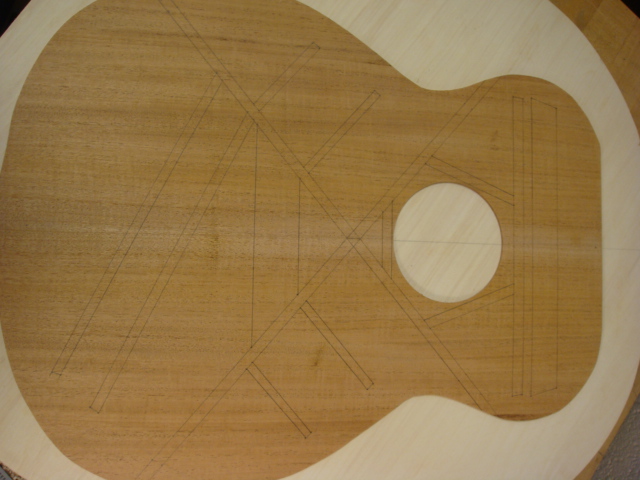
The inside of the top is then sanded smooth and the bracing pattern is drawn on using a pre-made plexi-glass template. At this point as you have seen a few photos back all the spruce brace wood has been rough cut and thickness sanded to the proper width and is ready to be radius, installed and carved.
Not bad for a few days work! Check in next week for more! Next week will be spent bracing the top and preparing the back and sides.


Cool postings Aaron Jon is enjoying watching the progress. I am too never seen the progress of how it is built.
ReplyDeletegood job !!!!!
ReplyDelete