Another week packed with new info! And A lot of work! The electric build is coming along slowly but surely, and I am learning more about finishing wood than I ever thought there was to know.
Monday and Tuesday were spent finishing our plywood body, routing, and head stock templates. These templates will serve as tracing and routing guides when cutting shaping and routing our electric guitar bodies and head stocks.
I have here a body outline template which will give me a guide to trace out the shape of the body onto the body wood and flush trimming the shape with a router. I created another template with the shape of the body and the pick up and control wiring cavities to use as a guide to rout those cavities into the body . I then made a template for the head stock shape.
The body will be made of Alder. I purchased a large Alder body blank that came with some imperfections and rough edges. I had to cut the chunk in half and join and plane the edges and faces to perfectly square to be re joined and glued together with no gaps. The 2 pieces are planed down to 1/16 inch over final thickness to leave room for final thickness and sanding. Then they are glued together and clamped for a few hours bringing the 2 back into 1. The cutting and re gluing is not necessary when using a 1 piece body blank if you have a joiner and planer wide enough to handle the entire body for squaring.
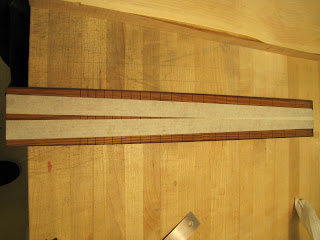
While this was drying I took the time to lay out the fingerboard taper and fret slots onto the gorgeous Cocobolo fingerboard blank that i have chosen for this project. I put 22 standard slots onto the board in a 24 inch short scale length. Next week I'll ad vintage style clay dot inlays on its face and bass edge before sanding in a 12 inch radius.
Shes a real beauty! Cant wait to see it up against a tortoise pick guard and sea foam green paint!
After the body joint was dry and strong i used my template to draw out the body shape onto the wood. Then i cut out the shape on a band saw and taped the template to the rough shape and flush trimmed it out to perfect on the router table. These two steps were a bit stress full The slightest miss step here could have been disastrous for the build. I took my time and worked carefully to ensure a problem free cut.
I also spent some time squaring up my flamed maple neck wood. The hard flamed maple will make a nice looking and very sturdy neck. This leaves me with all my body parts ready for next weeks work which includes cutting out the neck and head stock, installing the truss rod, fretting the fingerboard, laying out and routing the neck pocket, installing the bridge, and routing the control cavities.
And these are my mahogany project boards in Gibson Red and Medium Mahogany Sprayed with 8 coats of clear lacquer. The next step for these is level sanding smooth and polishing to a shine again.
I also Did some toning to my scarf joint mock up from last semester. it is a light beach wood aerosol toner. Tough to apply in an even coat to get even color.
Fridays repair class was spent learning how to make replacement Fender Style nuts. This process is similar to making acoustic style nuts with a few variations in the process. The micarta blanks are sanded down to the proper shape, the bottom is sanded into a radius to match the curved slot and the top is sanded to the same curve. The nut is then slotted for strings and the corners are rounded off for comfort and good looks. This skill will be valuable for repair work later.


No comments:
Post a Comment